
How to start
Eleven steps, about twenty minutes. The first nine happen in the Biklo dashboard and none of them needs a developer — a seller can do it and hand the keys over.
You need a company account. The Partner API is not available on a private seller account; if you sign in and the screen says so, that is why.
Click any screenshot to enlarge it.
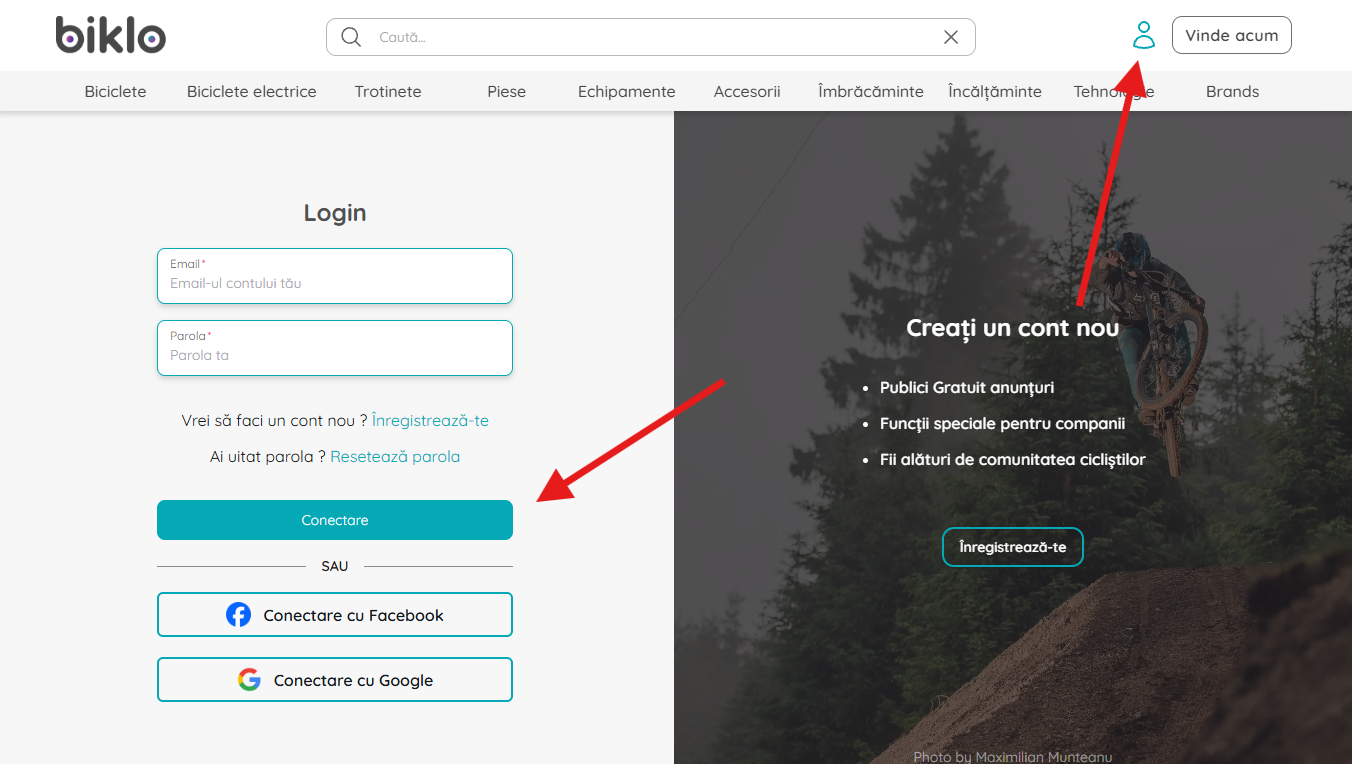
Sign in to Biklo#
Use the account that owns the listings. An integration acts as that seller, so keys issued here can only ever see and change that seller's own products, orders and money.
If the company does not have an account yet, register first — the API is only offered once the account is a company.
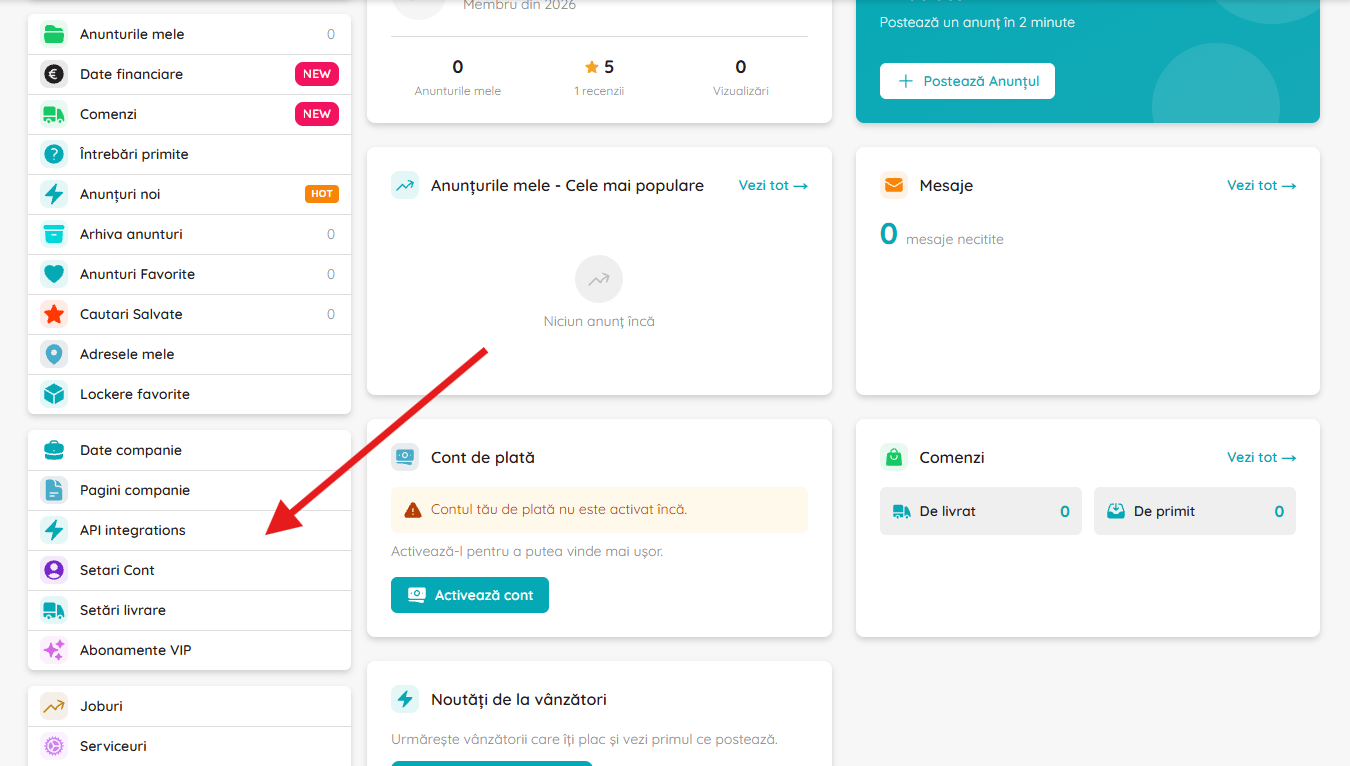
Open API integrations#
In your dashboard's left-hand menu, under the company block, choose API integrations. It sits between Pagini companie and Setari Cont.
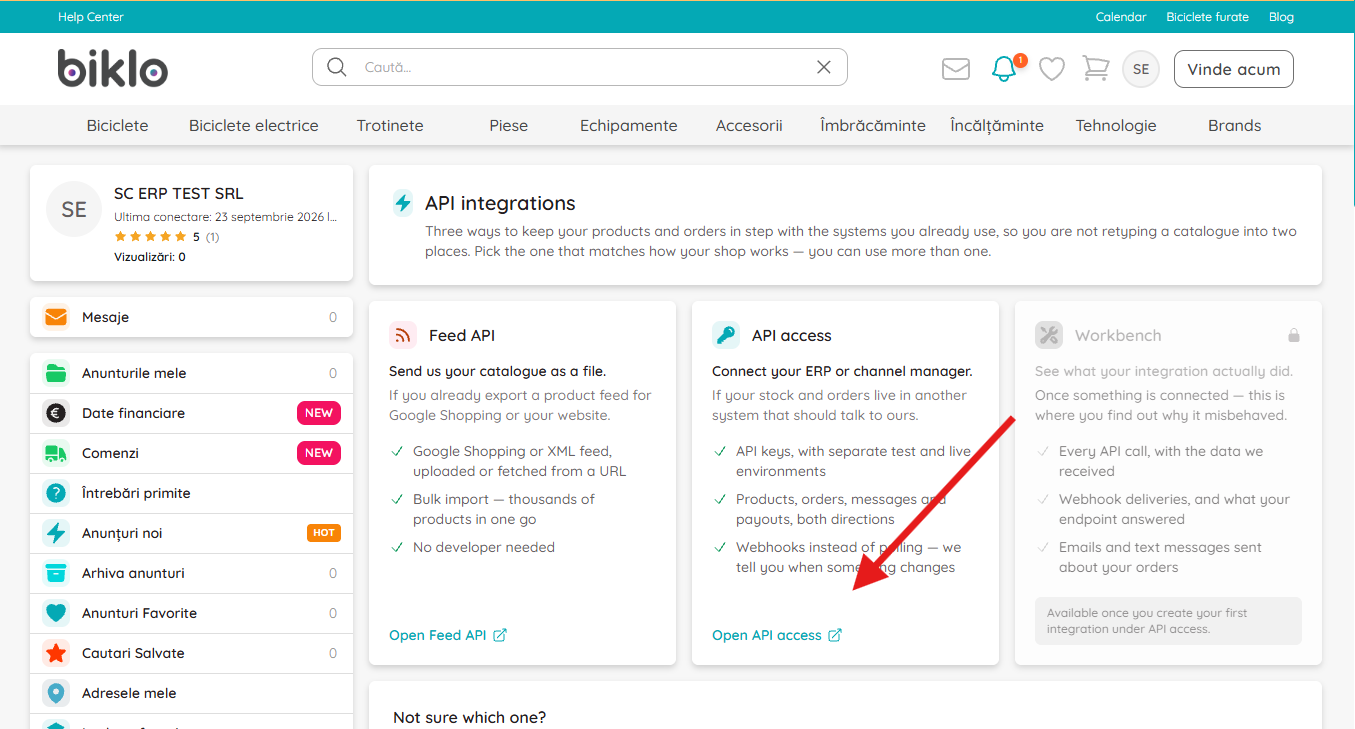
Pick API access#
Three ways to keep your products and orders in step with the systems you already run. You can use more than one.
- Feed API — send your catalogue as a file. If you already export a product feed for Google Shopping, this needs no developer at all.
- API access — what this guide is about: keys, products, orders, webhooks.
- Workbench — greyed out until you have an integration. Afterwards it is where you find out why one misbehaved.
Choose Open API access.
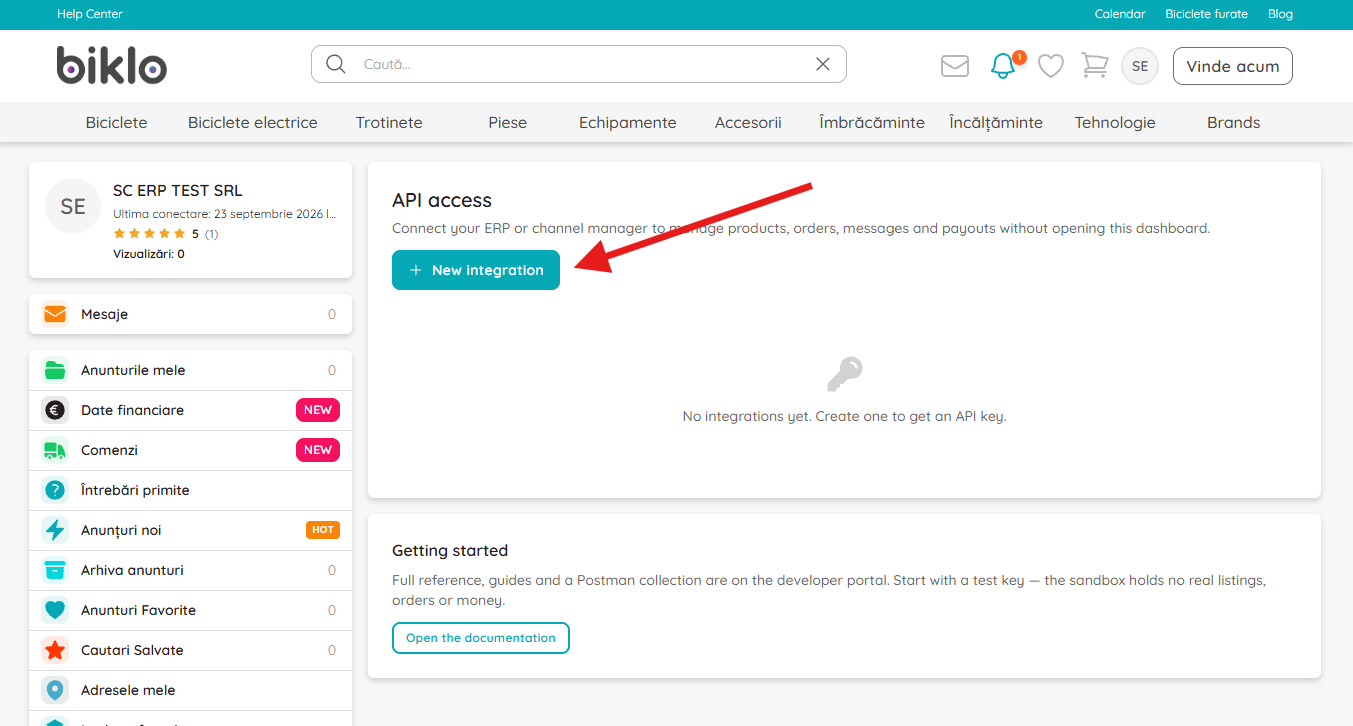
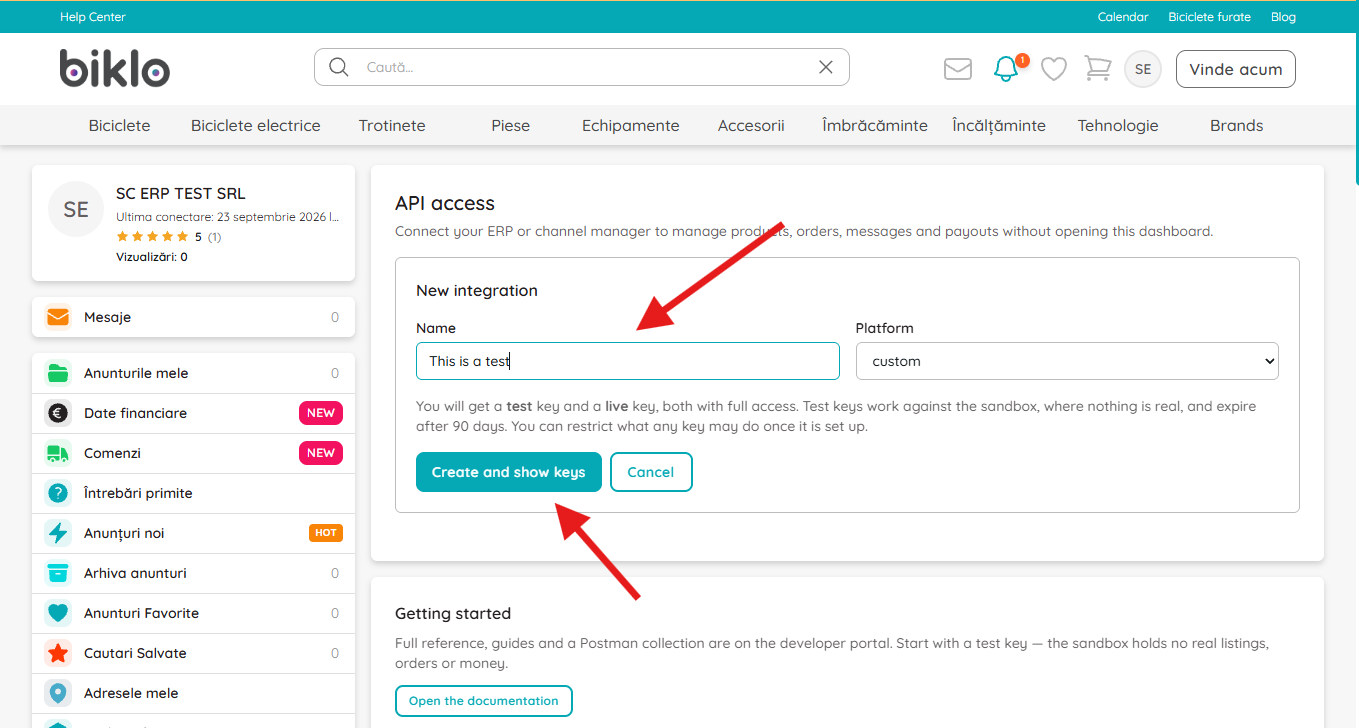
Name it, and pick the platform#
The name is for you — "Our warehouse system", "Nightly stock sync" — and it is what you
will see in the list later when there are three of them. Platform is custom unless
your vendor is in the list.
There is no permission picker here on purpose. Which scopes an ERP needs is a question
only its vendor can answer, so asking up front produces a guess — and a wrong guess
surfaces days later as a 403 inside someone else's software. You get full access now
and narrow it in step 8, once you can see what the integration actually calls.
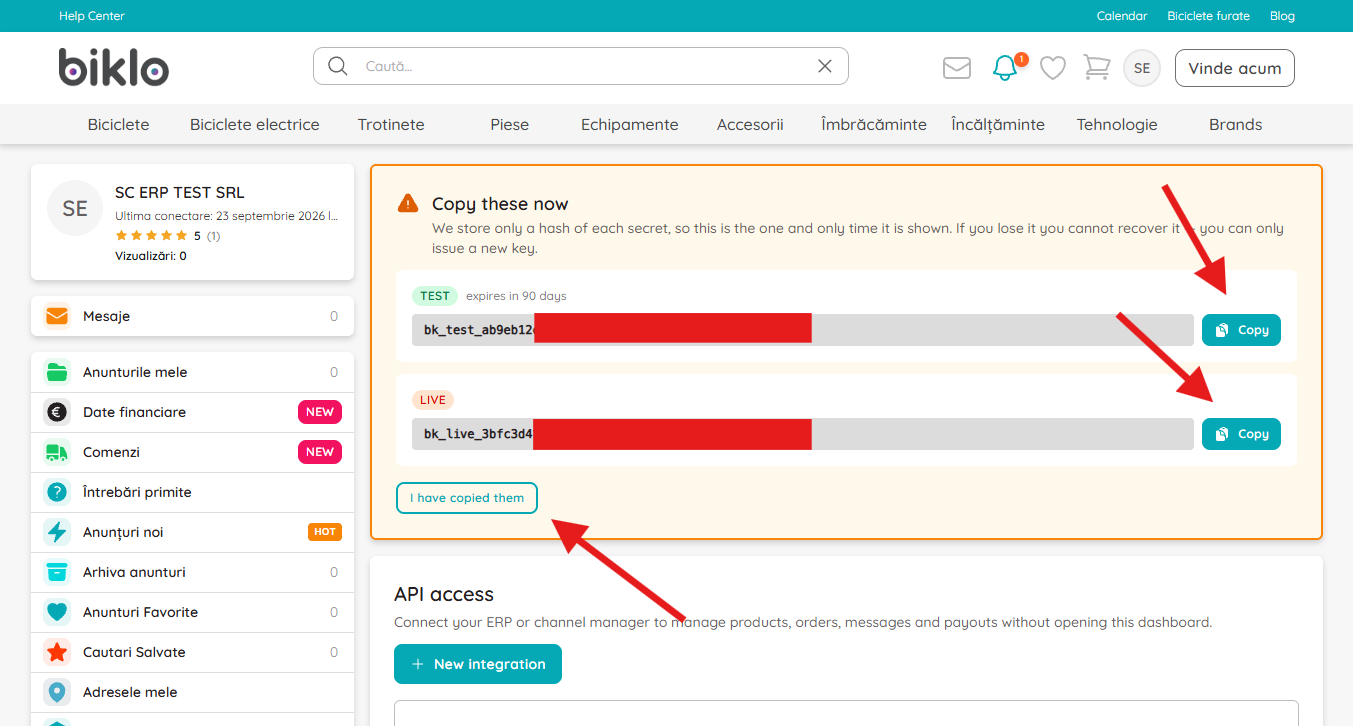
Copy both keys — this is the only time you see them#
We store a hash, not the key. Close this panel before copying and they are gone; the only way back is issuing new ones.
- TEST (
bk_test_…) talks to the sandbox, where nothing is real. It expires after 90 days. - LIVE (
bk_live_…) talks to the real marketplace — real listings, real buyers, real money. Do not put it in a config file until step 8.
Press I have copied them once they are somewhere safe.
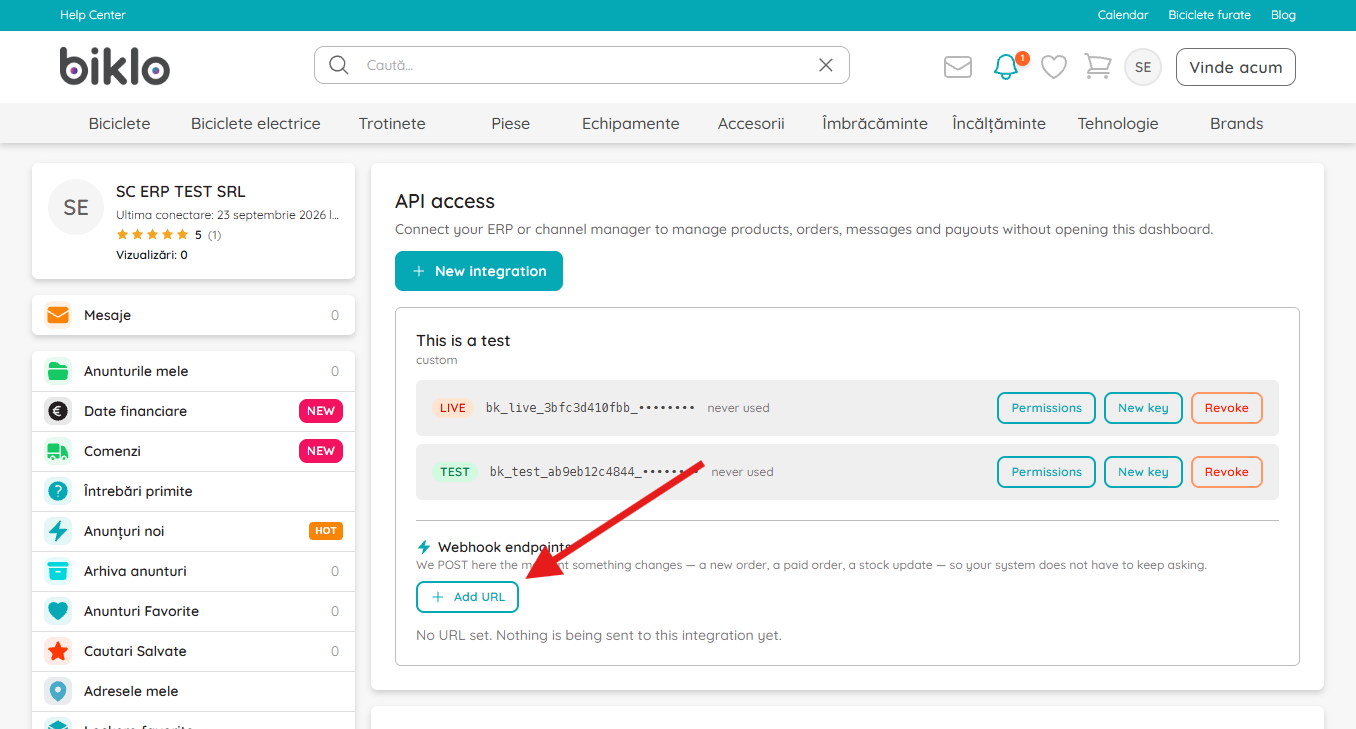
Add a webhook URL#
Your integration now exists and its keys are listed. Without a webhook your system has
to poll /v1/orders on a timer and will still be minutes behind, so press Add URL
under Webhook endpoints.
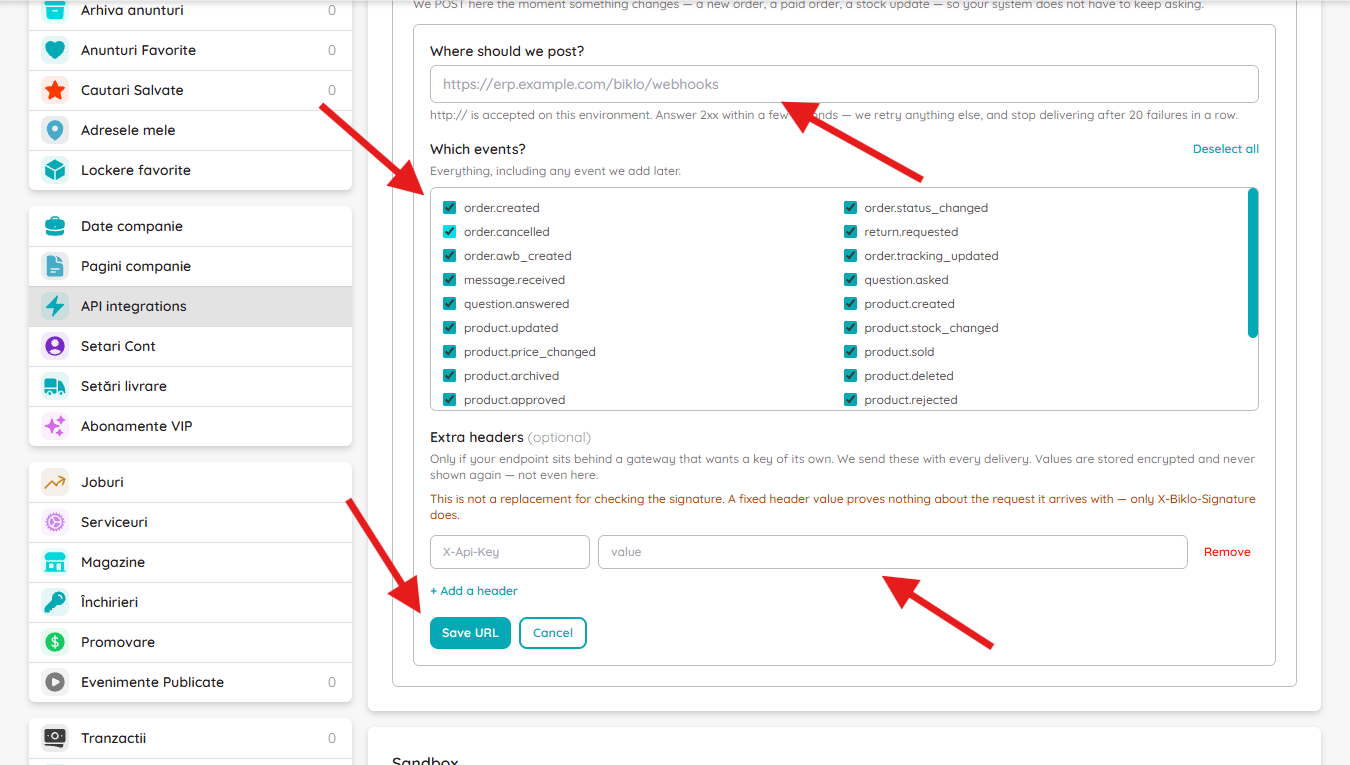
Choose events, add any gateway headers, save#
Where should we post — your endpoint. HTTPS in production; some environments accept
http://, and the hint under the field tells you which you are on.
Which events — everything is ticked, and leaving it that way also subscribes you to any event added later. Untick only if your system genuinely cares about a few.
Extra headers — optional, and only if your endpoint sits behind a gateway that wants
a key of its own. Values are stored encrypted and never shown again. They are not a
substitute for verifying X-Biklo-Signature: a fixed header value proves nothing about
the request it arrives with.
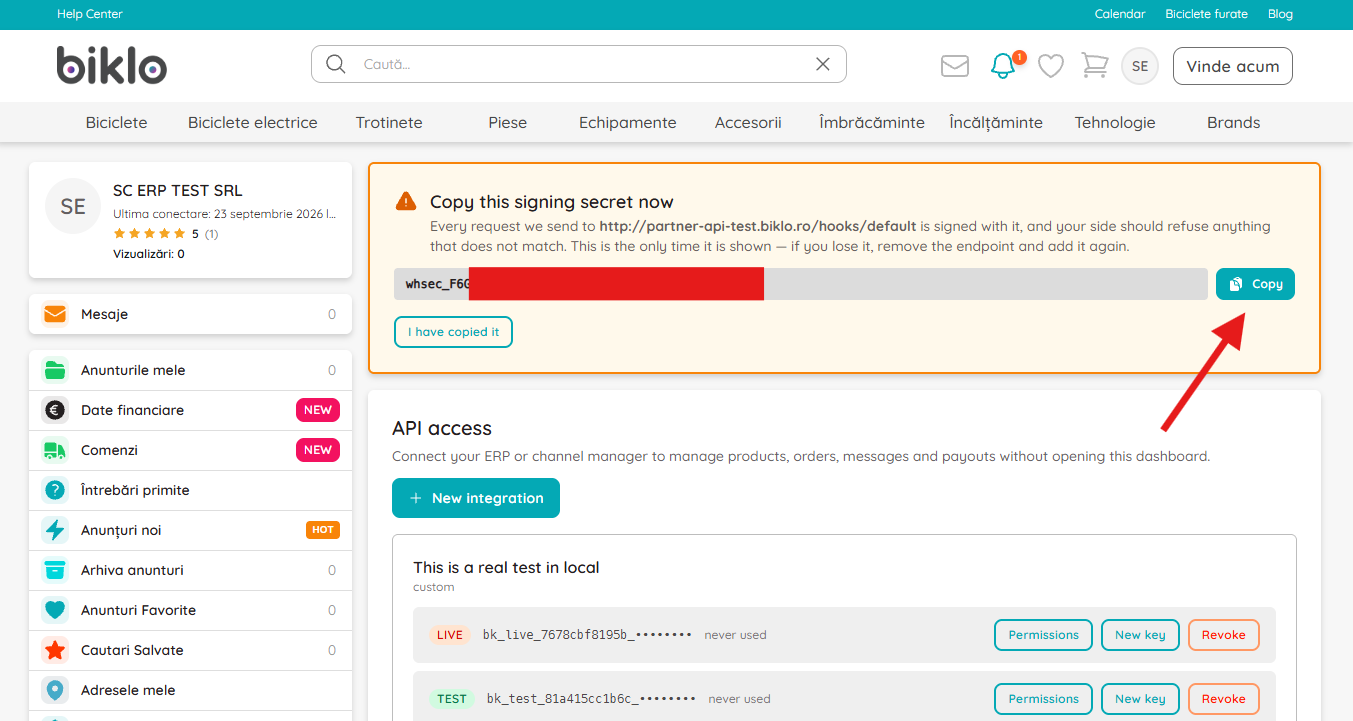
Copy the signing secret — also only once#
Saving the URL issues a signing secret (whsec_…), and this is the second one-time
secret in this guide. It is the one people miss: you have already done the copy-it-now
dance for the API keys, so a panel that looks the same gets dismissed out of habit.
Every delivery we send is signed with it, and your side should refuse anything that does not match:
X-Biklo-Signature: t=1757308800,v1=9f86d081884c7d659a2f…
v1 is hmac_sha256(timestamp + "." + raw_body, secret) — the same scheme Stripe uses.
Verifying it is what makes a webhook trustworthy; without it, anyone who learns your URL
can post you an order that never happened.
Lose it and there is no recovery: remove the endpoint and add it again, which issues a new one. Webhooks has a receiver you can paste.
Make your first call#
Against the sandbox, with the test key. If this returns your shop, everything above worked.
curl https://sandbox-api.biklo.com/v1/me \
  -H "Authorization: Bearer bk_test_…"
{
  "user": { "id": 4021, "name": "Your Shop SRL" },
  "company": { "id": 88, "name": "Your Shop" },
  "ready_to_sell": true
}
If ready_to_sell is false, read blockers in the same response — it says what is
missing, and it is almost always a pickup address. Addresses
covers that, and it is worth doing before you publish anything: a listing with no
address publishes cleanly and then cannot be shipped.
The Quickstart takes it from here — first product, first order.
Go live#
Two last things, once the integration is doing what you expect against the sandbox:
- Swap the test key for the live key. Same code, different base URL and credential.
- Narrow the permissions. Back on API access → Permissions, set each group to what the integration turned out to use. Wallet is the one to leave off unless something genuinely withdraws money.
When it goes wrong#
401— wrong key, or a test key against the live host. The environments do not cross.403 missing_scope— the key is real but was narrowed past what this call needs. Widen that group under Permissions.404on everything — usually a private seller account rather than a company one.- Anything else — every response carries a
request_id. Quote it and we can see the exact call, including what we answered. It is also the first column of Workbench in the dashboard, where the seller can read those calls back — including the body we received and the answer we sent — without asking anyone.